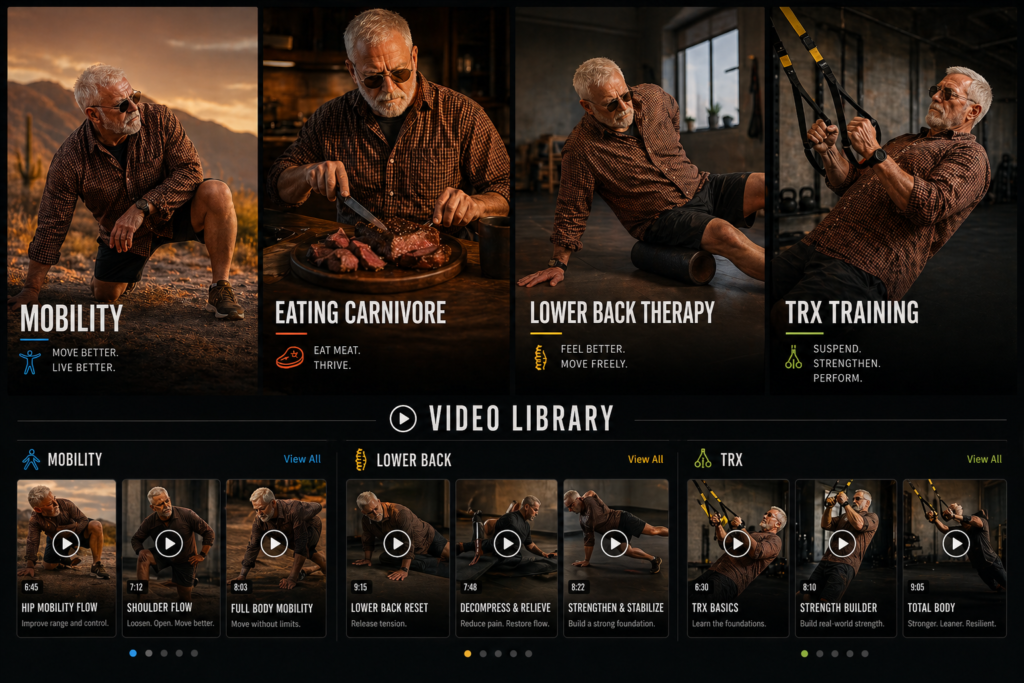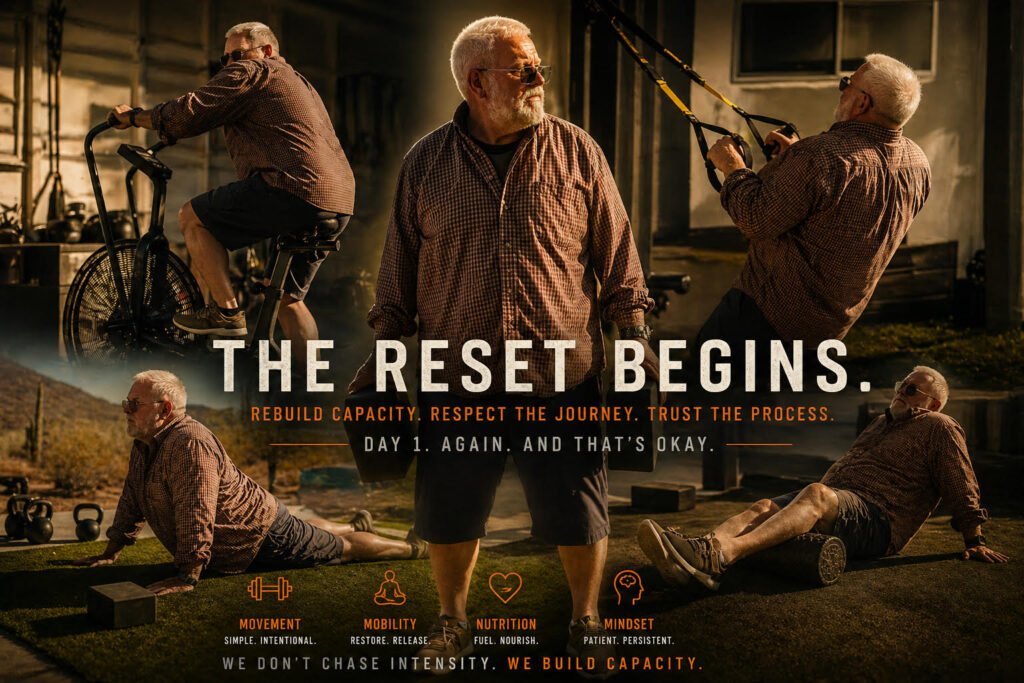
WELLNESS CSI • ROSS RESET PROTOCOL

Modified Conditioning + Lower Back Mobility

Ross, this section is built for your actual body — not some 28-year-old influencer doing burpees in neon shoes. You’ve had both legs and your back operated on. You are not running. You are not jumping. We are rebuilding capacity with smart, low-impact work that respects your joints, spine, weight, and current conditioning.

MODULE 1

The Movement Rules

This is the filter for everything we do. If it passes this filter, it stays. If it does not, it goes.

YES

  • Low-impact movement.
  • Short, repeatable sessions.
  • Breathing you can control.
  • Bike, recumbent bike, pool walking, gentle incline walking if tolerated.
  • Mobility that makes the back feel safer after, not angrier.

NO

  • No running.
  • No jumping.
  • No impact intervals.
  • No “push through the pain” nonsense.
  • No chasing intensity just because a YouTube doctor made it sound cool.
Success looks like: you finish feeling better, looser, more confident, and not destroyed.
Stop sign: sharp pain, radiating pain, numbness, dizziness, chest pain, or sudden back tightening means stop and get help if needed.
MODULE 2

Daily Mobility Must-Do: 3x Per Day

These are the daily anchors. Morning, midday, and evening. Small sessions. Clean reps. No drama.

Daily Schedule — Morning / Midday / Evening
  • Morning: right after you get up. This tells the body, “We are not starting the day like a rusty lawn chair.”
  • Midday: between activities or when stiffness starts creeping in.
  • Evening: when your body feels tight, tired, or cranky.
Goal: reduce stiffness before it builds into pain.
Primary Drill 1 — Prone Cobra
  • Lie face down.
  • Gently lift chest and arms into the prone cobra position.
  • Keep it clean, controlled, and smooth.
  • Think posture and activation, not height.
  • Hold briefly, then relax.
Coach’s cue: this should wake up the back side of the body, not jam the lower back.
Primary Drill 2 — Knees Over Toes Ground Stretch With Yoga Block
  • Use the yoga block standing up on edge, not flat.
  • Set yourself up on the ground where you can control the range.
  • Move slowly into the stretch.
  • No bouncing. No forcing. No “let’s see if this tears something loose today.”
Big takeaway: this and the prone cobra are your go-to drills when your back feels pressure.
Lower Back Relief Option — TRX Traction Stretch
  • Use the TRX that is already set up.
  • Find the position where your lower back can relax.
  • Gently sit back and let the spine decompress.
  • Do 5 easy reps.
  • Do not pull hard. This is decompression, not a tug-of-war with your skeleton.
MODULE 3

Support Tools: ROLLGA + Yellow Band

These are not random extras. These are pressure-release tools during the day.

ROLLGA Work — In The Shed
  • Single arm rolls.
  • Use the “karate chop” arm position.
  • Reach high with both arms.
  • One arm in the middle, then both arms.
  • Move the ROLLGA around your back and explore different spots.
  • Adjust your body angle and camber until you find the right pressure.
Goal: find useful pressure, not pain. The body learns better when it is not being mugged by the foam roller.
Yellow Band Work — Up-and-Over Stretch
  • Use the yellow band.
  • Go up and over slowly.
  • 2 times per day is perfect.
  • Seated or standing — whichever feels better.
  • Smooth, controlled movement.
Do not rush: fast sloppy reps are just exercise graffiti. Slow reps teach the body.
MODULE 4

Modified Conditioning: Norwegian 4x4 + Hard Eight

These are excellent interval ideas, but the original versions are too aggressive for Ross right now. So we keep the concept and modify the delivery.

Phase 1 — Foundation First: 2 to 4 Weeks
  • Goal: move without pain and build consistency.
  • Best options: recumbent bike, stationary bike, pool walking, or easy incline walking if tolerated.
  • Time: 10–20 minutes.
  • Frequency: 4–5 days per week.
  • Effort: easy to moderate. You should be able to talk.
This is not the boring phase. This is the “stop breaking yourself so the body can finally adapt” phase.
Modified Norwegian 4x4 — Ross Version

Original idea: 4 minutes hard, 3 minutes easy, repeated 4 times.

Ross version: we start smaller.

  • Warm up: 5 minutes easy.
  • 1 minute moderate effort.
  • 2 minutes easy recovery.
  • Repeat 4 rounds.
  • Cool down: 3–5 minutes easy.
Progression: after this feels easy, build toward 2 minutes moderate / 3 minutes easy. Later, maybe 3 minutes. We earn 4 minutes. We do not borrow it from the future and pay for it with back pain.
Modified Hard Eight — Ross Version

Original idea: 8 rounds of harder interval work.

Ross version: short controlled pushes with plenty of recovery.

  • Warm up: 5 minutes easy.
  • 20–30 seconds moderate effort.
  • 90 seconds easy recovery.
  • Repeat 6 rounds to start.
  • Build toward 8 rounds only when tolerated.
  • Cool down: 3–5 minutes easy.
Best equipment: recumbent bike first, stationary bike second, pool walking third. Walking intervals only if the feet, legs, and back approve.
Effort Scale — No Heart Rate Monitor Required
  • Easy: can talk normally.
  • Moderate: can speak in short sentences.
  • Hard: only a few words.
For Ross right now: most work lives in easy to moderate. Hard is earned later.
MODULE 5

Simple Weekly Plan

This gives Ross structure without turning his life into a spreadsheet hostage situation.

Day Main Focus Details
Monday Foundation Cardio 10–20 min easy bike or pool walk + daily mobility 3x
Tuesday Mobility + Tools Prone cobra, block stretch, TRX, ROLLGA, yellow band
Wednesday Modified 4x4 1 min moderate / 2 min easy x 4 rounds
Thursday Recovery Movement Easy bike, walking, or pool movement only
Friday Modified Hard Eight 20–30 sec moderate / 90 sec easy x 6 rounds
Saturday Easy Capacity 10–20 min low-impact movement
Sunday Reset Day Mobility only, hydration, sleep, food reset
Non-negotiable: daily mobility still happens morning, midday, and evening.
MODULE 6

Printable Movement Tracker

Track what you did and how your body responded. This keeps us honest and prevents guessing.

Date Mobility 3x? Conditioning Back Pain 1–10 Foot Pain 1–10 Notes
____/____☐ Yes ☐ No________________________________
Progress looks like: lower pain scores, better sleep, easier movement, more confidence, and fewer “my back hates me” moments.
WELLNESS CSI • ROSS RESET PROTOCOL

Modified Conditioning + Lower Back Mobility

Ross, this section is built for your actual body — not some 28-year-old influencer doing burpees in neon shoes. You’ve had both legs and your back operated on. You are not running. You are not jumping. We are rebuilding capacity with smart, low-impact work that respects your joints, spine, weight, and current conditioning.

MODULE 1

The Movement Rules

This is the filter for everything we do. If it passes this filter, it stays. If it does not, it goes.

YES

  • Low-impact movement.
  • Short, repeatable sessions.
  • Breathing you can control.
  • Bike, recumbent bike, pool walking, gentle incline walking if tolerated.
  • Mobility that makes the back feel safer after, not angrier.

NO

  • No running.
  • No jumping.
  • No impact intervals.
  • No “push through the pain” nonsense.
  • No chasing intensity just because a YouTube doctor made it sound cool.
Success looks like: you finish feeling better, looser, more confident, and not destroyed.
Stop sign: sharp pain, radiating pain, numbness, dizziness, chest pain, or sudden back tightening means stop and get help if needed.
MODULE 2

Daily Mobility Must-Do: 3x Per Day

These are the daily anchors. Morning, midday, and evening. Small sessions. Clean reps. No drama.

Daily Schedule — Morning / Midday / Evening
  • Morning: right after you get up. This tells the body, “We are not starting the day like a rusty lawn chair.”
  • Midday: between activities or when stiffness starts creeping in.
  • Evening: when your body feels tight, tired, or cranky.
Goal: reduce stiffness before it builds into pain.
Primary Drill 1 — Prone Cobra
  • Lie face down.
  • Gently lift chest and arms into the prone cobra position.
  • Keep it clean, controlled, and smooth.
  • Think posture and activation, not height.
  • Hold briefly, then relax.
Coach’s cue: this should wake up the back side of the body, not jam the lower back.
Primary Drill 2 — Knees Over Toes Ground Stretch With Yoga Blocks
  • Use the yoga block standing up on edge, not flat.
  • Set yourself up on the ground where you can control the range.
  • Move slowly into the stretch.
  • No bouncing. No forcing. No “let’s see if this tears something loose today. Hold 2 seconds,relax 10-20x each side”
Big takeaway: this and the prone cobra are your go-to drills when your back feels pressure.
Lower Back Relief Option — TRX Traction Stretch
  • Use the TRX that is already set up.
  • Find the squat position where your lower back can relax.
  • Gently sit back and let the spine decompress.
  • Do 5-10 easy reps.
  • Do not pull hard. Push from your heels when you stand up, and pull your belly button in....remember? This is decompression, not a tug-of-war with your skeleton.
MODULE 3

Support Tools: ROLLGA + Yellow Band

These are not random extras. These are pressure-release tools during the day.

ROLLGA Work — on the ground and In The Shed
  • Everything on your printed chart...and Single arm rolls.
  • Use the “karate chop” arm position.
  • Reach high with both arms.
  • One arm in the middle, then both arms.
  • Move the ROLLGA around your back and explore different spots.
  • Adjust your body angle and camber until you find the right pressure.
Goal: find useful pressure, not pain. The body learns better when it is not being mugged by the foam roller.
Yellow Band Work — Up-and-Over Stretch
  • Use the yellow band.
  • Go up and over slowly.
  • 2 times per day is perfect.
  • Seated or standing — whichever feels better.
  • Smooth, controlled movement.
Do not rush: fast sloppy reps are just exercise graffiti. Slow reps teach the body.
MODULE 4

Modified Conditioning: Norwegian 4x4 + Hard Eight

These are excellent interval ideas, but the original versions are WAY TO aggressive for you right now. So we keep the concept and modify the delivery.

Phase 1 — Foundation First: 2 to 4 Weeks
  • Goal: move without pain and build consistency.
  • Best options: recumbent bike, stationary bike, pool walking, or easy incline walking if tolerated.
  • Time: 10–20 minutes.
  • Frequency: 4–5 days per week.
  • Effort: easy to moderate. You should be able to talk.
This is not the boring phase. This is the “stop breaking yourself so the body can finally adapt” phase.
Modified Norwegian 4x4 — Ross Version

Original idea: 4 minutes hard, 3 minutes easy, repeated 4 times.

Ross version: we start smaller.

  • Warm up: 5 minutes easy.
  • 1 minute moderate effort.
  • 2 minutes easy recovery.
  • Repeat 4 rounds.
  • Cool down: 3–5 minutes easy.
Progression: after this feels easy, build toward 2 minutes moderate / 3 minutes easy. Later, maybe 3 minutes. We earn 4 minutes. We do not borrow it from the future and pay for it with back pain.
Modified Hard Eight — Ross Version

Original idea: 8 rounds of harder interval work.

Ross version: short controlled pushes with plenty of recovery.

  • Warm up: 5 minutes easy.
  • 20–30 seconds moderate effort.
  • 90 seconds easy recovery.
  • Repeat 6 rounds to start.
  • Build toward 8 rounds only when tolerated.
  • Cool down: 3–5 minutes easy.
Best equipment: recumbent bike first, stationary bike second, pool walking third. Walking intervals only if the feet, legs, and back approve.
Effort Scale — No Heart Rate Monitor Required and I do wish you would get one like and Apple Watch or Garmin Watch
  • Easy: can talk normally.
  • Moderate: can speak in short sentences.
  • Hard: only a few words.
For Ross right now: most work lives in easy to moderate. Hard is earned later.
MODULE 5

Simple Weekly Plan

This gives Ross structure without turning his life into a spreadsheet hostage situation.

Day Main Focus Details
Monday Foundation Cardio 10–20 min easy bike or pool walk + daily mobility 3x
Tuesday Mobility + Tools Prone cobra, block stretch, TRX, ROLLGA, yellow band
Wednesday Modified 4x4 1 min moderate / 2 min easy x 4 rounds
Thursday Recovery Movement Easy bike, walking, or pool movement only
Friday Modified Hard Eight 20–30 sec moderate / 90 sec easy x 6 rounds
Saturday Easy Capacity 10–20 min low-impact movement
Sunday Reset Day Mobility only, hydration, sleep, food reset
Non-negotiable: daily mobility still happens morning, midday, and evening.
MODULE 6

Printable Movement Tracker

Track what you did and how your body responded. This keeps us honest and prevents guessing.

Date Mobility 3x? Conditioning Back Pain 1–10 Foot Pain 1–10 Notes
____/____☐ Yes ☐ No________________________________
Progress looks like: lower pain scores, better sleep, easier movement, more confidence, and fewer “my back hates me” moments.
▶ Play Today’s TRX Video
FINAL SUPPORT SYSTEM • TRX TRAVEL LIBRARY

TRX For Travel, Mobility, Golf & Beginner Strength

Ross, this is your portable movement system. The TRX lets you stretch, decompress, move, strengthen, and rebuild confidence almost anywhere: at home, outside, in a hotel room, or on the road. The goal is not to become a Navy SEAL by Friday. The goal is simple: move better without beating your body up.

WHY THIS RESOURCE MATTERS

Ross, This Is Your “No Excuses, No Gym Required” Tool

Travel normally destroys routines. TRX solves that. It packs small, anchors to a door or solid overhead point, and gives you guided movement without needing machines, heavy weights, or a perfect schedule.

Why TRX Fits This Plan

  • Travel-friendly and compact.
  • Bodyweight resistance is adjustable.
  • Great for assisted squats, rows, hip hinges, stretches, and decompression.
  • Useful for golf mobility: rotation, hips, shoulders, and balance.
  • Good bridge from rehab-style movement to real strength.

Ross-Safe Setup Rules

  • Anchor only to a secure door, beam, rack, or solid outdoor anchor.
  • Test the anchor before every session.
  • Keep feet planted and body angle conservative.
  • No fast reps. No bouncing. No ego leaning.
  • Stop for sharp pain, nerve symptoms, dizziness, or back grabbing.
Coach’s cue: The straps are there to help you move better — not to help you invent new ways to fall in your living room.
EQUIPMENT DEEP DIVE

TRX Travel Setup: What Ross Needs

Keep this simple. Ross does not need a garage gym. He needs a safe anchor, enough space, and a short plan he can repeat.

Basic Equipment

  • TRX Suspension Trainer or similar quality straps.
  • Door anchor for travel/hotel use.
  • Small travel bag.
  • Comfortable shoes.
  • Yoga block nearby for modified floor work.

Best Anchor Options

  • Solid door that closes toward you, with door anchor placed correctly.
  • Beam or pull-up bar rated for bodyweight.
  • Strong tree branch or outdoor structure.
  • TRX XMount if installed properly.
  • Never use weak doors, loose posts, glass doors, or questionable hardware.
Safety: If the anchor feels questionable, it is questionable. Do not negotiate with gravity. Gravity has lawyers.
CATEGORY TABS

Choose Today’s TRX Category

Use this like a menu. Tight back? Start with Mobility + Stretching. Going on a trip? Use Travel Basics. Want golf mobility? Use the Golf tab. Feeling stronger? Try Beginner Strength.

Your TRX Video 1

Featured Ross TRX starting video.

Your TRX Video 2

Featured Ross TRX beginner video.

Your TRX Video 3

Featured Ross TRX mobility video.

Your TRX Video 4

Featured Ross TRX beginner / PT-style video.

Your TRX Video 5

Featured Ross TRX golf / functional movement video.

Your TRX Video 6

Featured Ross TRX beginner strength video.

Important: These are the six videos you gave me. I kept them together in their own first tab so they do not get buried or accidentally replaced.

User Pick — TRX Travel / Beginner

One of your chosen starting videos. Keep this as a featured “Ross starts here” option.

User Pick — TRX Basics

Useful for learning basic strap control and beginner-friendly movement.

User Pick — TRX Mobility

Good bridge between stretching and beginner strength.

20-Minute TRX Daily Stretch

Use on days Ross needs longer flexibility and mobility work.

TRX Mobility + Stretching

Good all-levels mobility session for morning or post-work recovery.

TRX Cool Down + Mobility

Use after easy bike, walking, or TRX strength work to calm the system.

6 TRX Mobility Exercises

Short, useful menu of movements for warm-up and joint prep.

TRX Full Body Workout For Over 60s

Strong fit for seniors, beginners, and people returning after injury.

10-Minute Beginner TRX With PT

One of your picks. Short, practical, and easier to repeat.

TRX For Older Adults — Part 1

Mobility and closed-chain movement for ankles, hips, thoracic spine, and shoulders.

TRX For Seniors — 60 to 80

Senior-focused basics: posture, balance, coordination, and everyday movement.

TRX For Golf — User Pick

Great fit for rotation, hips, shoulders, balance, and golf-specific mobility.

4 TRX Exercises For Golf

Good short golf-focused menu: hip mobility, flexibility, balance, and shoulder control.

TRX Golf 101

Beginner-friendly golf conditioning and mobility concepts.

TRX Golf Rotation

Rotation, hip hinge, dynamic flexibility, and core activation for better movement.

User Pick — Beginner Strength

Use this when Ross is ready for light strengthening without heavy equipment.

User Pick — Functional TRX Work

Good bridge from mobility into controlled strength patterns.

25-Minute TRX Full Body Flow

Only for better days. Ross can do part of it, not all of it.

Ross rule: strength work should feel like “I could do a little more,” not “I need a rescue team.”
Day TypeTRX FocusTimeRule
Stiff Back DayTRX assisted stretch + decompression5–8 minGentle only
Travel DayDoor-anchor mobility flow8–12 minKeep it easy
Golf Prep DayRotation, hips, shoulders8–15 minNo aggressive twisting
Strength DayRows, assisted squats, hip hinge, chest opener10–20 minStop before fatigue ruins form
Simple Ross routine: 2 minutes assisted breathing + 3 minutes mobility + 5 minutes easy strength. That is enough to win the day.
Ross rule: one TRX video per day is plenty. The point is consistency, not turning the straps into a midlife obstacle course.
TRACKER SYSTEM

Ross TRX Travel + Mobility Tracker

Use this to track what helped. We are looking for better movement, less stiffness, more confidence, and fewer “my back is running the meeting” days.

DayCategoryVideo Done?Before Pain 1–10After Pain 1–10Notes
Mon________☐ Yes ☐ No________________
Tue________☐ Yes ☐ No________________
Wed________☐ Yes ☐ No________________
Thu________☐ Yes ☐ No________________
Fri________☐ Yes ☐ No________________
Sat________☐ Yes ☐ No________________
Sun________☐ Yes ☐ No________________
Progress looks like: Ross can move with less fear, less stiffness, more control, and a little more confidence every week.

Ross… This Is Where It Starts To Shift

You don’t need to crush TRX workouts.
You don’t need to be perfect.
You just need to use the straps wisely and keep showing up.

Two focused TRX strength sessions each week is enough.
On the other days, use it for stretching, mobility, decompression, and staying loose.

Some days this will feel easy.
Some days your body will act like it wants to file a complaint with management.
Both days count.

Pick one video.
Keep the angle easy.
Move with control.
Stop before your ego grabs the handles.
This is not punishment.
This is you rebuilding trust with your body — one smart session at a time.
WELLNESS CSI • ROSS RESET PROTOCOL

Food Reset + Carnivore / Animal-Based Deep Dive

Ross, this is the food side of the reset. We are not trying to make nutrition complicated. We are removing the obvious inflammatory troublemakers, building meals around protein, and giving your body fewer problems to fight every single day.

MODULE 1

The Four Doctors — What They Agree On & Where They Differ

This keeps the information clean without turning Ross into a full-time nutrition researcher with a steak subscription.

Dr. Ken Berry

  • Calls his approach the Proper Human Diet.
  • Focuses on meat, eggs, seafood, animal fats, and low-carb real food.
  • Strongly removes sugar, grains, seed oils, and processed foods.

Dr. Anthony Chaffee

  • Leans stricter carnivore.
  • Usually favors meat, salt, water, and animal foods.
  • Less flexible with plants and carbs.

Dr. Paul Saladino

  • Now promotes more of an animal-based diet.
  • Uses meat, organs, fruit, honey, and dairy if tolerated.
  • Less strict than carnivore and includes more carbohydrates.

Dr. Sean O’Mara

  • Focuses on visceral fat, inflammation, performance, sleep, and lifestyle.
  • Often emphasizes animal-based eating and removing processed food.
  • Pairs food with movement, sprint-style conditioning when appropriate, and body composition change.
Ross version: start simple. We do not need the strictest version first. We need the version he can actually follow.
MODULE 2

The Ross Version: Clean Carnivore First

This is the starting protocol. Simple, repeatable, and focused on lowering inflammation.

Start Here — 30-Day Clean Carnivore Foundation
  • Beef, bison, lamb, turkey, chicken, fish, and seafood.
  • Eggs if tolerated.
  • Butter or ghee if tolerated.
  • Bone broth if desired.
  • Salt and electrolytes daily.
  • Water throughout the day.
Goal: reduce food noise, stabilize appetite, lower inflammation, and build a clean baseline.
Remove For 30 Days — The Inflammation Fire Starters
  • Sugar.
  • Bread, pasta, cereal, crackers, chips.
  • Seed oils: soybean, corn, canola, cottonseed, sunflower, safflower.
  • Fast food.
  • Processed snacks.
  • Alcohol.
  • Desserts pretending to be “just a small treat.”
Important: this is not punishment. This is pulling gasoline away from the inflammation fire.
Meal Structure — Two Meals or Three Smaller Meals

Option 1 — Two Meals

  • Meal 1: eggs and meat, or fish.
  • Meal 2: steak, burger patties, chicken thighs, salmon, or ground beef.

Option 2 — Three Smaller Meals

  • Meal 1: eggs or meat.
  • Meal 2: protein-based meal.
  • Meal 3: protein-based meal with enough fat to feel satisfied.
Coach’s cue: eat until satisfied. Not stuffed. Not starving. Satisfied.
MODULE 3

Hydration + Electrolytes

When carbs drop, the body can dump water and minerals. This is where people get headaches, cramps, fatigue, and then blame the plan instead of the missing salt.

Daily Hydration Rules
  • Drink water throughout the day.
  • Salt your food generously unless your doctor has told you otherwise.
  • Use electrolytes if headaches, cramps, or fatigue show up.
  • Magnesium at night may help, but only if approved and tolerated.
Simple target: water, salt, consistency. Boring works. Boring is underrated.
Green Powder Tip
  • Mix the green powder with water in a Magic Bullet.
  • Add a couple ice cubes.
  • Blend it smooth so it goes down easier.
  • Use it as a nutrient support tool, not a replacement for food.
Coach’s cue: if it tastes better, you are more likely to do it. Revolutionary, I know.
MODULE 4

Olive Oil Basics: The Simple Longevity Add-On

This is optional for strict carnivore, but useful for a hybrid longevity stack if tolerated.

What To Buy
  • Extra Virgin Organic Certified Olive Oil only.
  • Dark glass bottle or tin.
  • Look for harvest date when available.
  • Avoid “light,” “pure,” or cheap clear-bottle oils the more "bite" in your throat after you take it the better the oil. You can also poor it on your food.
Quality rule: fresh, extra virgin, dark bottle. That is the aisle-of-oil decision tree.
How Much + How To Use It
  • Use 1–2 tablespoons per day.
  • Add to meals after cooking.
  • Use on meat, eggs, fish, or vegetables if using a hybrid approach.
  • Do not chug it like a wellness fraternity initiation.
Bottom line: use it on food. Consistency beats theatrics.
MODULE 5

Longevity Stack: Two Versions

This gives Ross options without turning food into a theological debate.

Version 1 — Carnivore Performance Longevity Stack
  • Protein anchor: beef, eggs, fish, lamb, bison, chicken, turkey.
  • Animal fats if tolerated.
  • Electrolytes daily.
  • Bone broth or collagen support if desired.
  • Fish 2–3 times per week if tolerated.
  • Optional creatine if approved and appropriate.
Best for: simplicity, appetite control, inflammation reduction, and fewer food decisions.
Version 2 — Hybrid Longevity Stack
  • Protein first: meat, eggs, fish, seafood.
  • Extra Virgin Olive Oil: 1–2 tablespoons daily.
  • Optional low-sugar vegetables or berries if tolerated.
  • Herbs/spices if tolerated.
  • Electrolytes and hydration.
  • Sleep, walking, mobility, and recovery work.
Best for: long-term flexibility once the first 30-day baseline is established.
MODULE 6

Transition Symptoms: What Might Happen

The first week can feel strange because the body is switching fuel systems and detoxing from processed-food habits.

Possible First-Week Symptoms
  • Headache.
  • Fatigue.
  • Cravings.
  • Bathroom changes.
  • Lower energy before better energy.
This is not automatic failure. It may simply mean the body is adjusting. Hydration, salt, sleep, and patience matter here.
When To Slow Down Or Ask For Help
  • If symptoms are severe.
  • If dizziness, chest pain, unusual weakness, or concerning symptoms appear.
  • If medication, diabetes, blood pressure issues, kidney concerns, or major medical history are involved.
Important: Ross should check with his medical provider for anything medication-related or medically complex.
MODULE 7

Printable Food + Inflammation Tracker

Track what matters. This keeps the plan grounded in real feedback instead of guesswork.

Date Clean Food? Water / Electrolytes? Back Pain 1–10 Foot Pain 1–10 Energy 1–10 Notes
____/____☐ Yes ☐ No☐ Yes ☐ No________________________
Progress looks like: fewer cravings, better sleep, less pain, more energy, better movement, and a body that stops acting like it’s under attack.
WELLNESS CSI • ROSS RESET PROTOCOL

Lower Back + Psoas Mobility Video Library

Ross, this is your “my back is tight — what do I do?” section. These videos cover psoas, hip flexors, Thomas stretch, couch/wall stretch, icing, heat, and what to do when you overdid it.

MODULE 1

Why Hip Flexors + Psoas Matter

The psoas and hip flexors connect the trunk, pelvis, and legs. When they are tight, weak, guarded, or overworked, they can contribute to lower back pressure, poor posture, and that locked-up feeling after sitting.

Green Light

  • Mild front-of-hip stretch.
  • Better walking comfort after.
  • Less lower back pressure.
  • More relaxed breathing.

Red Light

  • Sharp pain.
  • Nerve pain down the leg.
  • Back grabbing or locking.
  • Hip pinching.
Big idea: Ross’s back may not need more punishment. It needs smarter inputs.
VIDEO CAROUSEL 1

PT-Style Back + Hip Mobility

Use these first when Ross needs simple, calm, follow-along movement.

Back / Hip Mobility — User Pick

One of your selected videos. Good slot for the practical “watch and do” section.

Hip Flexor + Mobility — User Pick

Supports the hip-to-low-back connection without making Ross guess what to do.

6-Minute Tight Hips + Low Back Routine

Short follow-along routine for tight hips and low back pain.

10-Minute Tight Back + Hips Routine

Use when Ross has more time and needs a full mobility reset.

Ross rule: pick one video, do it gently, then stop. No YouTube binge-stretching Olympics.
VIDEO CAROUSEL 2

Thomas Stretch + Hip Flexor Test

The Thomas stretch/test helps Ross understand whether hip flexors are pulling on the pelvis and feeding lower-back pressure.

Thomas Test — Iliopsoas Tightness

Good visual explanation of the Thomas test for hip flexor/iliopsoas tightness.

Modified Thomas Test

Useful for a safer, more controlled version of the test.

Thomas Stretch With Strap

Good option if Ross needs support and better control.

Ross rule: do not force the leg down. If the back tightens, reduce range immediately.
VIDEO CAROUSEL 3

Couch / Wall Stretch

This is useful but can be too aggressive. Ross starts with a chair/couch version before the wall version.

Couch Stretch — Hip Opener

Clear demonstration of the couch stretch pattern.

Couch Stretch For Tight Hip Flexors

Good general tutorial for the stretch. Modify heavily for Ross.

Couch Stretch + Lower Back Tension

Connects hip flexor work to back and knee tension.

Ross-Safe Couch Stretch Rules
  • Start with chair/couch before wall.
  • Pad the knee heavily.
  • Stay tall through the chest.
  • Do not arch the lower back.
  • Hold 15–30 seconds only.
Stop sign: lower back grabbing means the stretch is too aggressive.
VIDEO CAROUSEL 4

Psoas Release + Hip Flexor Strength

This is the missing piece: psoas may feel tight because it is weak, guarded, or overworked. Stretching alone is not always the fix.

Psoas: Tight vs Weak — User Pick

Important concept: Ross needs release plus control, not endless stretching.

Unlock Hip Flexor Tightness

Good for combining soft tissue ideas with exercise-based solutions.

Tight Hip Flexors: Root Cause

Useful for explaining why tightness keeps coming back.

Coach’s cue: we are teaching the hip flexors to calm down and work better, not just yanking on them.
VIDEO CAROUSEL 5

Icing / Heat / What To Do If You Overdid It

This is the recovery row. Ross needs to know when to ice, when to heat, and how not to make a flare-up worse.

Ice or Heat For Lower Back Pain

Practical guidance on choosing cold or heat for lower-back pain.

Heat or Ice — Research-Based

Good reality check: heat and ice can help symptoms, but they are tools, not miracles.

Ice vs Heat — How To Decide

Useful for Ross when he is unsure what to use after a flare-up.

How To Apply Heat Lying Down

Good positioning demo for safe lower-back heat application.

Ross-Safe Ice / Heat / Advil Rules
  • Fresh flare-up: ice 10–15 minutes, wrapped in a towel.
  • Stiff/tight back: heat 10–15 minutes may help loosen guarding.
  • Contrast option: heat 10–15 minutes, cold 3–5 minutes, repeat 2–3 rounds, finish cold.
  • After icing: do gentle movement. Do not ice and then freeze yourself on the couch for two hours.
  • Advil/ibuprofen: only if medically safe for him. Lowest effective dose, shortest time. Avoid or ask a doctor first with ulcers, kidney issues, blood thinners, heart disease, high blood pressure, or medication conflicts.
Stop and get help: chest pain, severe weakness, numbness, loss of bowel/bladder control, worsening nerve pain, fever, trauma, or pain that keeps escalating.
MODULE 6

Mini Daily Routine: What Ross Actually Does

Time What To Do How Long Notes
Morning Gentle hip flexor / psoas mobility + prone cobra 5–8 min Easy range. No forcing.
Midday Chair/couch stretch or Thomas stretch variation 2–5 min Short holds. Stay tall.
Evening TRX decompression + gentle mobility 5–10 min Calm the back before bed.
Flare-Up Ice or heat based on symptoms, then gentle movement 10–15 min No direct ice on skin.
Bottom line: Ross does not need a circus routine. He needs small, repeatable resets that lower tension and rebuild confidence.
WELLNESS CSI • ROSS RESET PROTOCOL

Lower Back + Psoas + Core Video Library

Ross, this is the “my back is tight — what do I watch and do?” section. This library covers hip flexors, psoas, Thomas stretch, couch stretch, abdominal wall tone, inner-unit stability, foam rolling, ROLLGA, Theragun, ice, heat, and flare-up recovery.

VIDEO CAROUSEL 1

Paul Chek / CHEK-Inspired Core + Abdominal Wall + Back Concepts

This row gives the deeper “why.” The back is not separate from the abdominal wall, breathing, organs, pelvis, hips, and the inner stabilizing system.

Abdominal Tone Essentials

Important for understanding how abdominal tone affects posture, breathing, and back support.

The Ab Wall Can Do More

Explains why endless crunches are not the answer and why the abdominal wall must function intelligently.

Intelligent Abs — Forward Ball Roll

Higher-level core concept. Not necessarily Ross’s starting exercise, but excellent education.

Strengthen The Inner Unit

Inner-unit stability concept connected to CHEK-style back training and spinal support.

Ross version: no aggressive ab training yet. Start with breathing, pelvic control, gentle bracing, and pain-free movement.
VIDEO CAROUSEL 2

PT-Style Back + Hip Mobility

Back / Hip Mobility — User Pick

One of your selected videos. Good practical “watch and do” video for Ross.

Hip Flexor + Mobility — User Pick

Supports the hip-to-low-back connection without making Ross guess.

6-Minute Tight Hips + Low Back

Short follow-along routine for tight hips and back pressure.

Ross rule: pick one video, do it gently, then stop. No binge-stretching Olympics.
VIDEO CAROUSEL 3

Thomas Stretch + Hip Flexor Test

Thomas Test — Iliopsoas Tightness

Good visual explanation of the Thomas test for hip flexor/iliopsoas tightness.

Modified Thomas Test

Useful for a safer, more controlled test version.

Thomas Stretch With Strap

Good option if Ross needs support and better control.

Ross rule: do not force the leg down. If the back tightens, reduce range immediately.
VIDEO CAROUSEL 4

Couch / Wall Stretch

Couch Stretch — Hip Opener

Clear demonstration of the couch stretch pattern.

Couch Stretch For Tight Hip Flexors

Good general tutorial. Modify heavily for Ross.

Couch Stretch + Low Back Tension

Connects hip flexor work to back and knee tension.

Ross version: chair/couch before wall, pad the knee, 15–30 seconds, no lower-back arching.
VIDEO CAROUSEL 5

Psoas Release + Hip Flexor Strength

Psoas: Tight vs Weak — User Pick

Critical concept: Ross needs release plus control, not endless stretching.

Unlock Hip Flexor Tightness

Good blend of soft tissue ideas and exercise-based solutions.

Tight Hip Flexors: Root Cause

Useful for explaining why tightness keeps coming back.

Coach cue: calm it down, then teach it to work better.
VIDEO CAROUSEL 6

Theragun / ROLLGA / Foam Roller

Massage Gun For Lower Back Pain

Use around the back — glutes, hips, hamstrings, mid-back. Avoid direct spine pressure.

ROLLGA Back Relief

Good ROLLGA-specific demo for back relief.

ROLLGA On The Wall

Best Ross-safe option because wall pressure is easier to control.

Stop Foam Rolling The Low Back

Important concept: roll around the problem, not directly into the spine.

Ross rule: tools should reduce guarding, not create bruising, numbness, or more pain.
VIDEO CAROUSEL 7

Ice / Heat / Contrast Therapy

Ice or Heat For Low Back Pain

Practical lower-back-specific guidance on choosing ice or heat.

Heat or Ice — Research-Based

Good reality check on what heat and ice can and cannot do.

Ice vs Heat: How To Decide

Useful when Ross is unsure what to use after a flare-up.

Ross-Safe Recovery Rules
  • Fresh flare-up / irritated pain: ice 10–15 minutes, wrapped in towel.
  • Stiff or guarded back: heat 10–15 minutes may help loosen guarding.
  • Contrast option: heat 10–15 minutes, cold 3–5 minutes, repeat 2–3 rounds, finish cold.
  • After ice or heat: gentle movement, not couch collapse.
  • Advil / ibuprofen: only if medically safe, lowest effective dose, shortest time.
Medical red flags: loss of bowel/bladder control, saddle numbness, severe weakness, fever, trauma, chest pain, or worsening nerve symptoms.
WELLNESS CSI • ROSS RESET PROTOCOL

Therapy Tools + Recovery Modalities

Ross, this is the tool section: Theragun, ROLLGA, foam roller, ice, heat, and what to do when your back feels like it sent a strongly worded email to management.

MODULE 1

Tool Rules: What Goes Where

Use the right tool for the right job. Randomly attacking the back with gadgets is not a recovery plan.

Use Tools For

  • Muscle guarding and stiffness.
  • Glutes, hips, quads, hamstrings, calves.
  • Upper/mid-back tightness.
  • Post-workout soreness.
  • Short relief before gentle movement.

Do Not Use Tools For

  • Sharp pain.
  • Nerve pain down the leg.
  • Direct pressure on the spine.
  • Numbness, burning, or weakness.
  • Trying to “beat inflammation into submission.”
Ross rule: tools should leave you feeling looser, calmer, and safer — not bruised, irritated, or more inflamed.
VIDEO CAROUSEL 1

Theragun / Massage Gun For Back + Hips

Massage guns can be useful, but Ross should avoid direct spine work and focus on the muscles around the hips, glutes, quads, hamstrings, and upper/mid-back.

Massage Gun For Back Pain Relief

Good basic introduction to using a massage gun for back-pain relief.

Massage Gun For Lower Back Pain

Useful setup for lower-back-adjacent work. Ross still avoids direct spine pressure.

Massage Gun By Yourself

Helpful for learning self-use without needing someone else to hold the tool.

Ross-Safe Massage Gun Rules
  • Use low setting first.
  • 30–60 seconds per area.
  • Stay on muscle, not bone or spine.
  • Best targets: glutes, outer hips, quads, hamstrings, calves, upper/mid-back.
  • Avoid kidney area, front of neck, direct lumbar spine, and painful nerve zones.
Stop: tingling, numbness, bruising, sharp pain, or worsening symptoms.
VIDEO CAROUSEL 2

ROLLGA Techniques

ROLLGA is useful because its shape can spare bony areas and target muscles more comfortably. For Ross, wall-based rolling may be safer than floor-based rolling at first.

ROLLGA Back Relief

Specific ROLLGA back-relief demo. Use gently and avoid direct aggressive low-back pressure.

ROLLGA On The Wall

Great Ross-safe option because the wall lets him control pressure without getting stuck on the floor.

ROLLGA Glutes

Glutes can feed back pain. This is a useful lower-back-adjacent target.

ROLLGA Wall Rolling

Best starting point if Ross needs control and less bodyweight pressure.

Ross-Safe ROLLGA Rules
  • Start on the wall before the floor.
  • Use short passes: 30–60 seconds.
  • Target mid-back, glutes, hips, quads, hamstrings, calves.
  • Do not smash the lumbar spine directly.
  • Use “useful pressure,” not pain.
Coach’s cue: ROLLGA should make movement easier afterward. If it makes him guard more, he did too much.
VIDEO CAROUSEL 3

Foam Roller: What To Roll + What NOT To Roll

Foam rolling can help, but lower-back pain often responds better when Ross rolls the surrounding areas: glutes, hips, quads, hamstrings, and mid-back.

Stop Foam Rolling The Low Back

Important concept: don’t just grind directly into the low back. Work around the problem.

Foam Roll Low Back: Right Way

Use as education, but keep Ross conservative and symptom-guided.

Foam Roller For Tight Hips

Better target for Ross: hips and surrounding tissue instead of direct spine pressure.

Foam Rolling Glutes

Glute tension can contribute to back discomfort. This is a safer target area.

Ross-Safe Foam Roller Rules
  • Roll around the back first: glutes, hips, quads, hamstrings, calves.
  • Use mid-back/thoracic work gently.
  • Avoid aggressive direct lumbar pressure.
  • Keep sessions short: 3–8 minutes total.
  • Follow with gentle mobility or walking.
Bottom line: foam rolling is not a punishment device. It’s a nervous-system conversation.
VIDEO CAROUSEL 4

Ice / Heat / Contrast Therapy

Use this row when Ross overdid it, feels inflamed, or needs to understand whether cold or heat makes more sense.

Ice or Heat For Low Back Pain

Practical lower-back-specific guidance on choosing ice or heat.

Heat or Ice — Research-Based

Good reality check on what heat and ice can and cannot do.

Ice vs Heat: How To Decide

Useful when Ross is unsure what to use after a flare-up.

Heat vs Cold — Common Mistake

Bob & Brad-style explanation of when people misuse heat or ice.

Ross-Safe Ice / Heat Rules
  • Fresh flare-up / hot irritated pain: ice 10–15 minutes, wrapped in a towel.
  • Stiff/tight guarded back: heat 10–15 minutes may help loosen muscle guarding.
  • Contrast option: heat 10–15 minutes, cold 3–5 minutes, repeat 2–3 rounds, finish cold.
  • After icing: gentle movement, not couch collapse.
  • Never: sleep with a heating pad or put ice directly on skin.
Simple decision: inflamed and angry = cold first. stiff and guarded = heat first. uncertain = gentle movement + short trial, then reassess.
VIDEO CAROUSEL 5

DIY Ice Packs + Positioning

This row helps Ross set up ice correctly so he doesn’t just slap frozen peas on his back and hope the universe fixes him.

DIY Effective Ice Pack

Physical therapy recipe for making a flexible ice pack.

Best DIY Cold Pack

Another Bob & Brad-style option for an at-home cold pack.

Positioning + Sciatica Tips

Useful if symptoms feel sciatic or nerve-related. Modify carefully.

Best Icing Position For Ross
  • Lie on back.
  • Knees bent or legs elevated on chair.
  • Ice pack wrapped in towel.
  • 10–15 minutes to start.
  • Slow breathing while icing.
  • Afterward: 2–5 minutes gentle walking or mobility.
Stop: burning, numbness, skin irritation, worsening nerve symptoms, or pain escalation.
MODULE 6

What To Do If Ross Overdid It

This is the “oops, I did too much” plan.

Situation First Move Then Avoid
Back feels hot / irritated Ice 10–15 min Gentle walk or mobility Stretching aggressively
Back feels stiff / guarded Heat 10–15 min TRX decompression or gentle mobility Long sitting after heat
Hips feel tight ROLLGA wall / glute work Short psoas or couch stretch Grinding low back directly
Sore after intervals Easy movement + hydration Ice or heat based on symptoms Another hard workout
Advil / Ibuprofen Note
  • Ibuprofen/Advil may help some flare-ups if medically appropriate.
  • Use the lowest effective dose for the shortest time.
  • Take only as directed on the label or by a clinician.
  • Avoid or ask a doctor/pharmacist first with ulcers, kidney disease, blood thinners, heart disease, high blood pressure, stomach bleeding risk, or medication conflicts.
  • If pain keeps escalating, do not keep covering it up with pills and tools. Get checked.
Medical red flags: loss of bowel/bladder control, saddle numbness, severe weakness, fever, trauma, chest pain, or worsening nerve symptoms.
Bottom line: calm it down, move gently, hydrate, sleep, and do not turn one overdone day into a five-day setback.
DAILY SUPPORT SYSTEM • DR. KRISTIE ENNIS

Your Daily Movement Library For The Days You Don’t Feel Like Moving

Ross, this is your “just press play” section. When your back is stiff, your hips feel like concrete, or your motivation has left the building without forwarding its mail, come here.

WHY THIS RESOURCE MATTERS

Ross, This Is Your “I Don’t Know What To Do Today” Button

Starting over at this stage is no small thing. Losing 100+ pounds, rebuilding strength, and learning to move again takes patience. So we are not looking for perfect. We are looking for repeatable.

Use Her Videos When

  • Your back is tight.
  • You feel stiff from sitting.
  • You need a short win.
  • You need guidance without overthinking.

Ross Rules

  • One video is a win.
  • Two videos is optional.
  • Three videos means your ego found the remote.
  • Stop if symptoms increase.
Coach’s cue: We are not chasing perfect workouts. We are rebuilding trust, one small session at a time.
CATEGORY TABS

Choose Today’s Category

Back tight? Start with Back + Hips. Need an easy win? Daily Flow. Feeling ready for more structure? Core + Posture.

3-Minute Hip + Spine Mobility

For the “I can do three minutes” days. Those count.

6-Minute Tight Hips + Low Back

Great daily reset for stiffness and low-back pressure.

12-Minute Hip Mobility

Use on better days when you have a little more gas in the tank.

4 Simple Low Back Exercises

Back talking? Start here before it writes a novel.

Loosen Hips + Reduce Low Back Pain

Good when hip stiffness feeds lower-back pressure.

Gentle Back + Hip Stretch

A calmer option for sore, stiff days.

Spine Mobility + Core Strength

Posture, spine movement, and core control without madness.

Easy Core For Back Pain

Simple core work that respects the back.

Core Exercises To Avoid

Watch this so you don’t accidentally turn “core day” into “back regret day.”

Back Strength + Posture

Beginner-friendly strength for standing taller and moving better.

Hips + Shoulders Mobility

Great after sitting, traveling, or feeling like a human folding chair.

Core + Back For L4/L5/S1

Use gently and only within pain-free range.

Dr. Kristie Ennis Playlists

Use this if you want to browse by category later.

Link: Open Playlists

Dr. Kristie Ennis Featured Page

Use this to see newer or featured videos.

Link: Open Featured Page

Ross rule: Pick one. Press play. Do what you can. Then stop before your enthusiasm gets you in trouble.
TRACKER SYSTEM

Dr. Kristie Daily Video Tracker

DayCategoryVideo Done?Before PainAfter PainNotes
Mon________☐ Yes ☐ No________________
Tue________☐ Yes ☐ No________________
Wed________☐ Yes ☐ No________________
Thu________☐ Yes ☐ No________________
Fri________☐ Yes ☐ No________________
Sat________☐ Yes ☐ No________________
Sun________☐ Yes ☐ No________________

Welcome

tips and tricks For Your Puppy

Submit A Valid Email And Get Our Weekly Newsletter Completely Free